
In today’s cybersecurity landscape, managing a high volume of security alerts can be overwhelming for security operations teams. This is especially true for organizations using Microsoft Defender for XDR (Extended Detection and Response) integrated with Microsoft Sentinel. While these tools provide robust threat detection and response capabilities, the sheer number of incidents generated can lead to alert fatigue, where genuine threats might be overlooked amidst false positives or low-priority alerts. Additionally, there is often the challenge of the same incident being investigated on both platforms, leading to redundant efforts and inefficient use of resources.
To combat this, Microsoft Sentinel offers powerful automation capabilities, allowing security teams to automatically manage and suppress certain types of incidents based on predefined criteria. In this blog post, we will explore how to suppress Defender for XDR incidents by automatically closing them using an automation rule in Microsoft Sentinel.
Understanding Automation Rules in Microsoft Sentinel
Automation rules in Microsoft Sentinel enable you to automate incident management tasks, such as assigning incidents, changing their severity, adding tags, or even closing them. By leveraging automation rules, you can streamline your incident response process, reduce manual effort, and focus on high-priority threats that require immediate attention.
Why Suppress Defender for XDR Incidents?
Suppressing incidents, such as those generated by Microsoft Defender for XDR, can be beneficial in various scenarios:
- Incident Already Investigated in XDR: Sometimes, incidents generated by Defender for XDR are already under investigation within the XDR platform itself. Suppressing these in Microsoft Sentinel helps avoid redundant efforts and allows the security team to focus on incidents that haven’t been addressed yet.
- Reducing Alert Noise: Not all alerts are equally important. By suppressing low-priority or false-positive alerts, you can reduce the noise and focus on incidents that matter.
- Improving Efficiency: Automation rules can automatically handle routine tasks, freeing up security analysts to focus on more complex investigations.
- Maintaining Compliance: In some cases, certain alerts need to be acknowledged and closed for compliance reasons, even if they do not pose a significant threat.
Step-by-Step Guide to Suppressing Defender for XDR Incidents in Microsoft Sentinel
- Access Microsoft Sentinel: Start by logging into your Azure portal and navigating to Microsoft Sentinel. Select the workspace where your Defender for XDR is integrated.
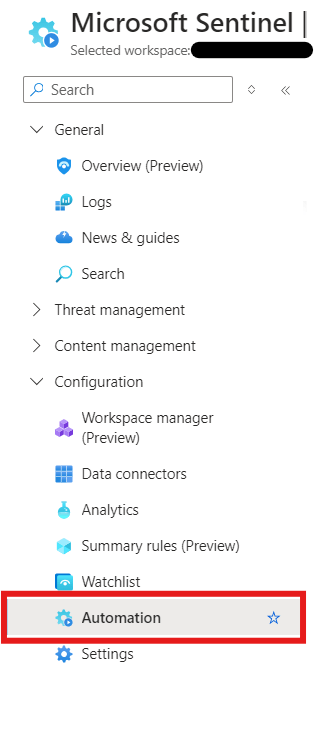
- Navigate to Automation Rules: In the Microsoft Sentinel dashboard, go to the “Configuration” section on the left-hand menu and select “Automation”
- Create a New Automation Rule: Click on the “Create” button and select “Automation Rule” to create a new automation rule. You’ll be prompted to provide a name and description for the rule. Name it something descriptive like “Suppress Defender for XDR Incidents.”
- Set Conditions for the Automation Rule: Under the “Conditions” section, define the criteria that will trigger this rule. For example, you might want to set the condition to trigger for incidents where the “Alert product names” is “Microsoft Defender for Endpoint.”
- Add Actions to Close the Incident: In the “Actions” section, choose “Change status” from the dropdown menu. You can further specify the reason for closing, such as “False Positive” or “Informational” etc.

- Test and Enable the Rule: Before enabling the rule, you can test it to ensure it behaves as expected. Once satisfied, click “Enable” to activate the rule and click “Apply”.
- Monitor and Adjust as Needed: After implementing the rule, regularly monitor its effectiveness. If you find that some important incidents are being suppressed, you may need to adjust the conditions or refine your criteria.
Best Practices for Using Automation Rules
- Regularly Review Your Rules: Automation rules should not be set and forgotten. Regularly review them to ensure they are still relevant and effective.
- Use Specific Criteria: The more specific your conditions, the better you can fine-tune which incidents are suppressed and which are not.
- Document Your Rules: Maintain documentation of all automation rules, including their purpose and conditions, to ensure transparency and ease of management.
Conclusion
By leveraging automation rules in Microsoft Sentinel, you can effectively suppress unnecessary Defender for XDR incidents, allowing your security team to focus on real threats. In this post, we discussed one way to suppress or optimize false-positive incidents using automation rules by automatically closing them. This approach not only improves operational efficiency but also ensures that critical alerts are not missed in the noise. Start using automation rules today to enhance your incident management strategy.

Leave a comment